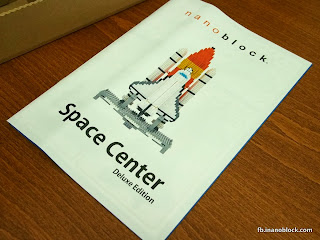
Difficulty: Level 6
Time to Complete: 7 hours
No of Blocks: 1600+
Item Code: NB-017
 |
| Front of the box |
 |
| Back of the box |
This is the all new Deluxe Edition of the nanoblock Space Center. It comes with over 1600+ pieces of bricks in a really big box. As you can see in the photo below, everything could have fit in a box half the size, as the box is kinda empty. I suppose a bigger box makes you feel better about spending so much on this set ... Haha ...
 |
| What's inside the box |
 |
| All the bricks that comes with this set |
Normally, most nanoblock sets come with a single piece of paper containing the complete build instructions. This set comes with a book containing over 30 pages of instructions! When you see this, you know you are going to be in for a real challenge.
 |
| The building instructions |
An interesting thing about this nanoblock set is that it comes with many new or rarer types of bricks, as shown in the photo below. I think the 1x6 bricks are going to be quite handy and the upward angled brick would be useful for refining some designs. The round ones are interesting too, but I think I will need more of them for it to be useful in my custom builds.
This is a Level 6 nanoblock set, making it the most complex nanoblock set I have built to date. While it may not seem very complicated from looking at the photos of the completed space center, believe me, it will take a lot longer than you think. It actually took me close to seven hours!
Looking for the bricks used in each step of the process is a very time consuming task. I would highly recommend that you take the bricks out of the bags and sort them out into containers before you start. It would save you a lot of time.
The design of this set is quite "fragile" in a number of places, especially when putting all the pieces of the orange booster rocket together. If you use too much force when snapping them together, you could end up smashing them. Anyway, here are photos of the build process below.
The finished Space Center in "Stand-by State" stands at almost 26cm tall. This deluxe edition's design is more detailed and a lot more refined compared to the old space center set, thanks to the use of 3 times more bricks and also new types of bricks.
There are quite a few extra bricks included, as shown in the photo below.
Here are photos of the completed Space Center in "Stand-by State".
You can also display the space shuttle in "Flight State" as shown below. Instructions are provided for you to build a transparent stand with adjustable tilt. The cargo bay doors can be opened and you can deploy a satellite using robotic arms. There's also a very tiny astronaut.
 |
| Yes, that's an astronaut on the right |
I bought this set from Plamoya at 20% discount for around USD60 not including shipping. You can find this deal by
clicking here. If it is listed as "sold-out", do check it again later, as they restock 2-3 times daily.